Jump To:
When logging into the Phone app, use the same login credentials that you use to login on the web & Tablet app:
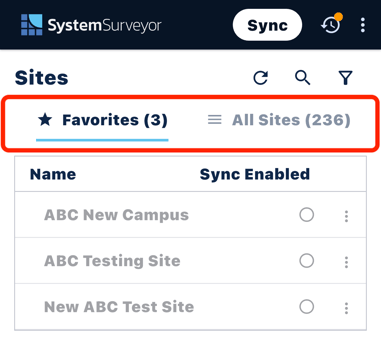
Site List Screen
Upon logging in, you will see two tabs that are used to organize the Sites in your account.
- All Sites: Contains all of the Sites on your Team, including Sites that have been created by other users on your Team.
- Favorites: Used to organize the Sites that you are actively working on. Sites must be added to the Favorites tab in order to be synced to the app.
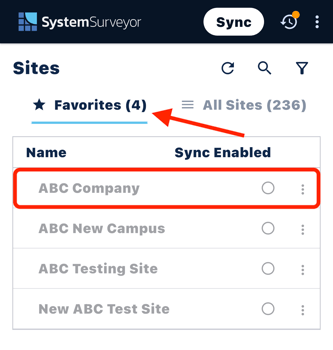
Adding Sites to Favorites
-
Tap the All Sites tab and locate the Site(s) you wish to add.
- Use the Search function (magnifying glass) to quickly search for your Site(s).
- Add the Site(s) to your Favorites by tapping the "three dots" to the right of the Site name and selecting Favorite.

- Tap the Favorites tab to view the Site(s) that you added.
Syncing Sites
You may notice that the Sites added to your Favorites will still appear in grey and cannot yet be opened. This is because they still need to be synced to the app.
To enable Site(s) for syncing:
- Tap the bubble to the right of the Site name, under the Sync Enabled column.
- You can select up to 25 Sites at a time.

- With your Site(s) enabled, download them to the app by tapping the Sync button.
- This will download all Sync Enabled Sites, along with all Surveys within them.
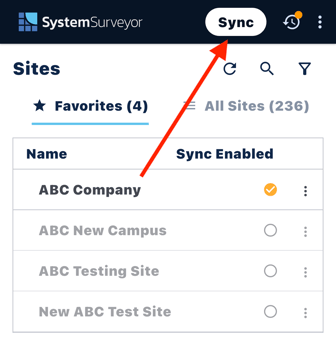
- When the sync is complete, the Sync button will turn green and each downloaded Site will appear with a green check-mark under the Sync Enabled column.
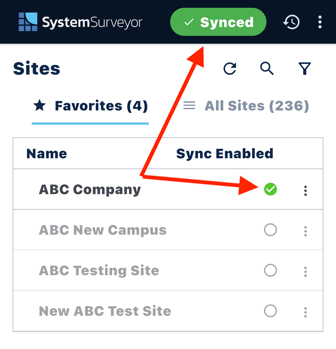
- Tap on a downloaded Site to open it and edit your Surveys.
Editing Surveys
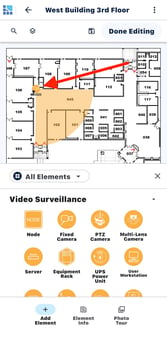
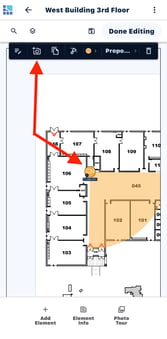
Adding Elements:
- Add Elements to your Survey by tapping the Add Element button.
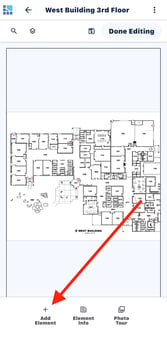
- If you have configured Favorite Elements on the web, you can choose them from the Favorite Elements tab. Otherwise, tap on any System Type (e.g. Video Surveillance) to access Elements.

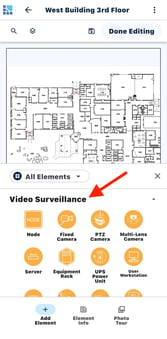
- Drag & Drop Elements from the palette to the floor plan to place them.
Element Info:
This is where all of your device specifications are stored.
- Tap an Element icon from your Survey to open the Element Toolbar.
- Tap the Pencil icon from the Element Toolbar to open the Element Info section.

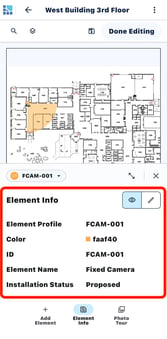
- To edit the Element Info (adding Element Profiles, model numbers, etc.), tap the Pencil icon within the section.
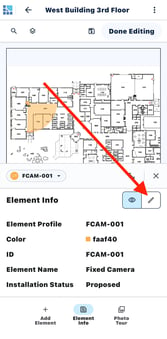
- Expand the Element Info section to full screen by tapping the double-sided arrow icon.


Capturing Photos:
Photos can be captured and automatically associated with any particular element on your Survey from the Element Toolbar.
- Tap the Element on your Survey that you wish to capture a photo for.
- Tap the Camera icon from the Element Toolbar that appears. This will open the camera.
- Capture your photo and use the Drawing Tools to add any text or annotations.
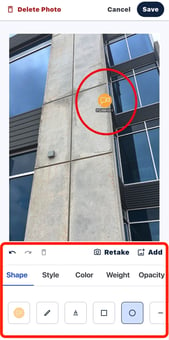
- Associate the photo with the Element by tapping Save.
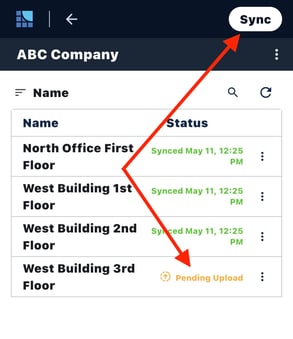
Saving & Uploading
When you are finished with your work session, be sure to save your progress and upload your changes to the cloud.
- Tap the Save icon at the top of the Survey Edit screen.
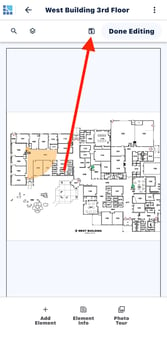
- Navigate back to the Site Overview, where you will see the Survey displayed with a Pending Upload status.
- Tap the Sync button to upload your changes to the web.
Settings
Check out our full guide on Mobile App settings here: Device Options & Control Panel.